![]()
![]()
![]()
by Bill Noble
This article is copyright W Noble, Oct 2002. Permission is hereby granted to display and print this article for personal non-commercial use only. For permission to reproduce in quantity, or to use for commercial purposes, please contact the author at william_b_noble@IEEE.org .
If you hear a belt slipping, it's time for an adjustment. Here are some pointers for htis procedure. Detailed steps are in the Factory manual, pages 13-32 and 13-33.
First, before you start, have the right tools. In fact, given the critical importance of these belts to your car, carry these tools and parts with you at all times, along with a pair of spare belts. Unlike a water cooled car, driving at all with a broken fan belt will be fatal to the engine.
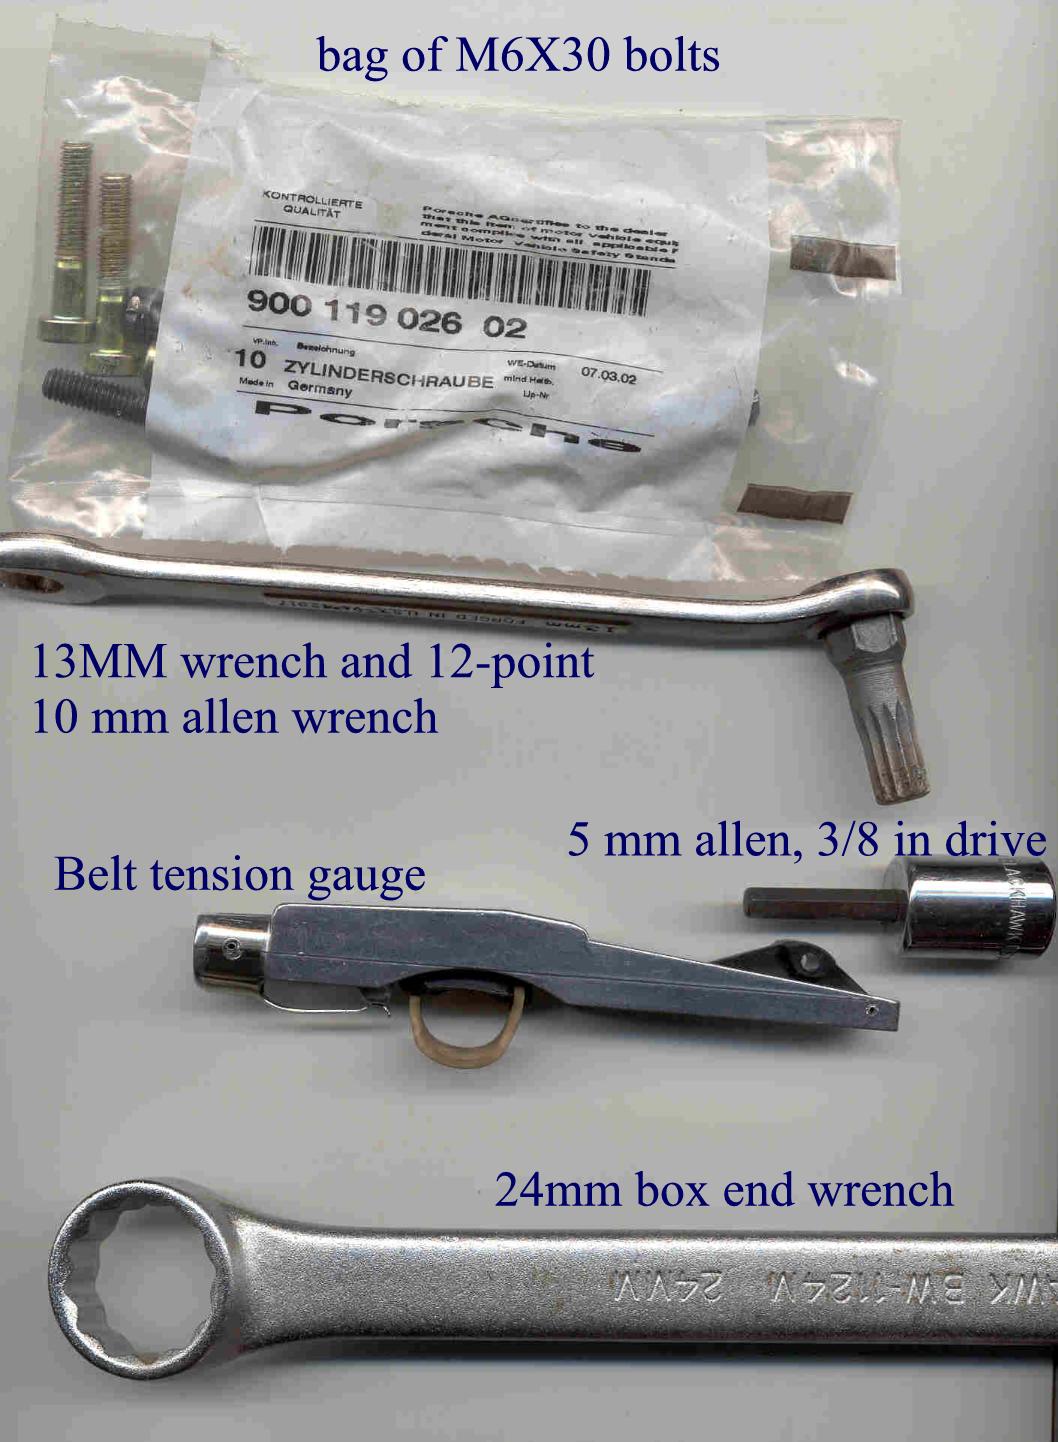 |
The picture shows the tools and parts you should have:
1. A bag of M6X30 screws, Porsche part # 900-119-026-02, or equivalent. These take a 5 mm Allen wrench. 2. A 12 point Allen wrench, this one is made by KD, part number 2305. If you get the KD tool, use a cut-off saw to shorten it as shown and then grind the cut end smooth. You hold the tool with a 13 mm wrench. 3 A5 mm Allen wrench with 3/8 drive socket - get a good quality tool, and you may avoid stripping the M6 screws. 4. Belt tension gauge, Gates part number 91107. 5. 24 mm box end wrench |
Procedure - measure tension with the tension gauge and see what belt (if any) needs to be tightened. Specs are at least 15 - 23 Kg cold, at least 20 -28 hot. For a new belt tension is 23-25 Kg cold, 28-40 Kg hot.
Don't be cheap, buy the tension gauge - it will save you a lot of hassle for only $10.
Presuming belts need to be tightened, use the 12 point Allen wrench to hold the alternator shaft, and the 24 mm box end wrench to loosen the nut (it is right hand thread, but may be very tight). Use a second wrench on the 13 mm wrench if needed.
When loose, remove nut, backing plate, outer pulley half and shims, remove belt, remove inner pulley half and shims, remove rear backing plate.
Now, check the inner belt again (the one that drives the fan). Presuming it's too loose, then:
After removing the 3 screws and calming down, remove the shims, the outer pulley half, and one inner shim.
Put the outer pulley half back, then the shims, then the M6 screws. Tighten the screws uniformly. Crank the engine over a few times (if it starts, turn it off right away) and then measure the tension with the gauge. If it's ok, proceed, if not, undo the screws and remove another shim, and try again.
Note that there are two thickness of shims, 0.5 and 0.7 mm. The 0.7 mm shim has a 2 mm hole drilled in it. My car had only 0.7 mm shims new from the factory.
Once you have gotten the inner belt properly tensioned, then do the outer belt. Put the backing plate, inner pulley half, and one less shims than you took out on the shaft, then the belt, then the outer pulley half, the rest of the shims, and the 24 mm nut.
Tighten the nut to 50 ± 5 Nm (that's pretty darned tight). Start the engine, shut it back off and test the tension of the belt.
Put the left over bolts and stuff into your tool kit that you carry with you.