Replacing 993 Air Duct
By William Noble Aug 31, 2009
Copyright W Noble, permission to use for noncommercial purposes granted
If you have a 993, you will need to replace the air duct that lies on the top of the fan shroud soon – the wonderful German rubber will deteriorate, become brittle and fall apart. This will leave you with a big hole; less airflow to the cylinders (because the air goes out the hole rather than over the cylinders) and it’s annoying.
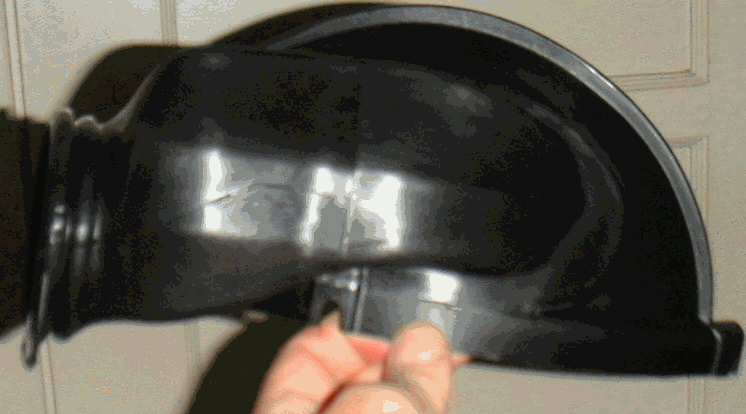
Fortunately, the part is inexpensive ($50 in Sept 2009) from the dealer. Part number is 993 106 403 00, it’s called Luftfuehrung and it’s shown below:
It consists of a nice plastic portion with a rubber molded in hose part that clips over the fan plenum to the left side of the engine.
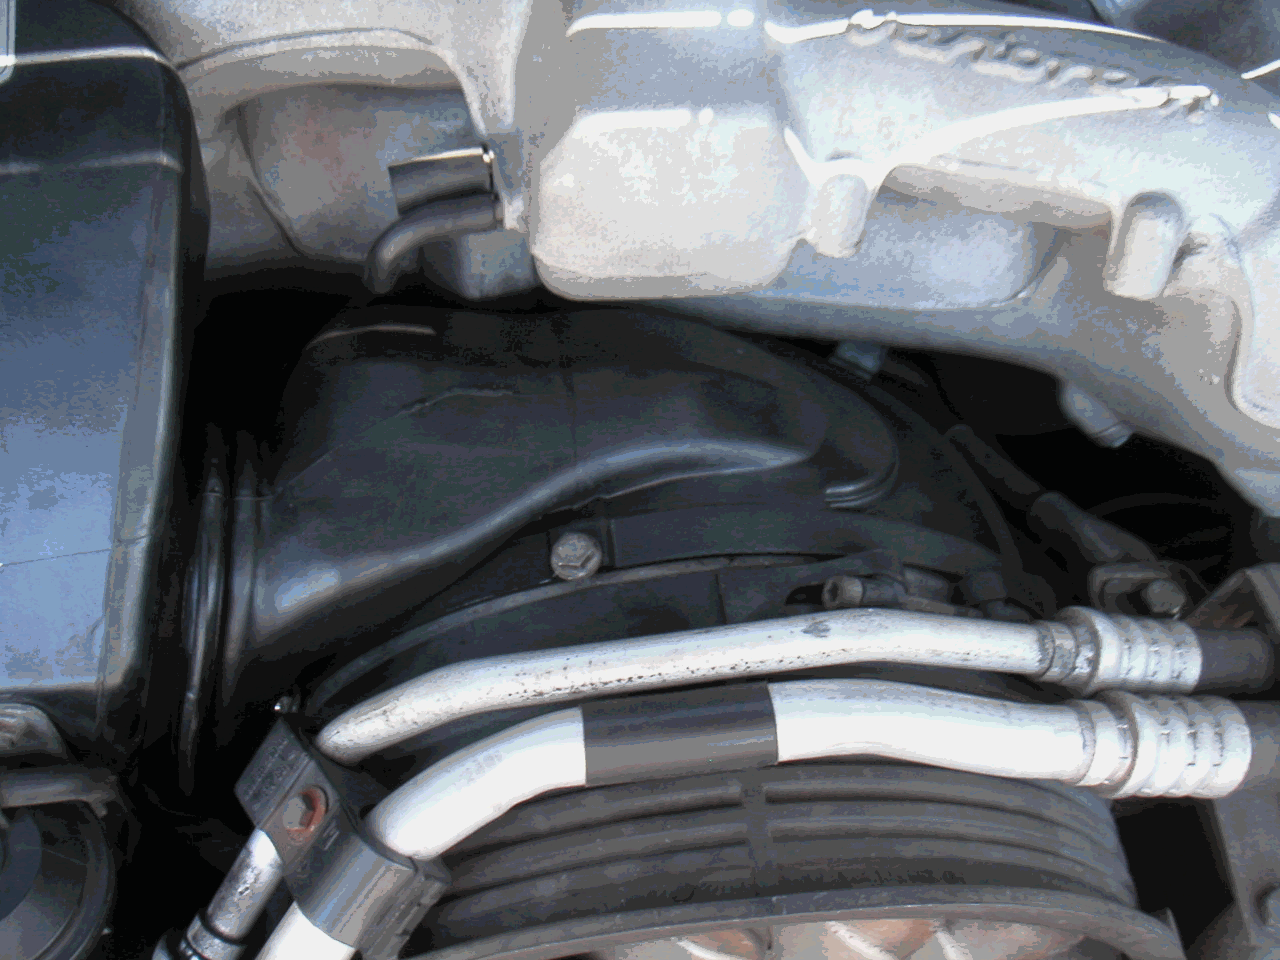
To remove this thing should be easy – just remove 3 screws, right? The screws all have 10mm hex heads, what can be so hard? Well, it isn’t – the screw in the center is easy enough – just unscrew (beware, it will be quite stiff, it bonds to the aluminum. The one on the right side is nearly impossible – access is blocked by the AC pump and AC hoses – if your AC pump is not too hard to remove and replace, it will save you time to loosen it and push it out of the way – on my car, it’s quite hard to get the AC belt back on so I elected to leave it in position - at least remove the clamp that holds the AC hoses in place near the compressor – that will give you a little more access. I found the best access to the RH bolt was to reach under the AC hoses and flip the 10 mm wrench over – thus moving it 1/12th turn at a time.
Since you are first removing the old one, just take a knife and cut the gooey old rubber off so you can see what you are doing. Loosen the left side screw until it hits the AC compressor bracket. The left side screw is hidden by the rubber hose, so when you cut the rubber off it will be easy enough to see – loosen it a lot – or remove it (but don’t drop it or you will be fishing for it all day). With two of the three screws removed or really loose and the right side screw as loose as it will go, you can now remove the old assembly (with some modest difficulty).
What you will see will look like this:
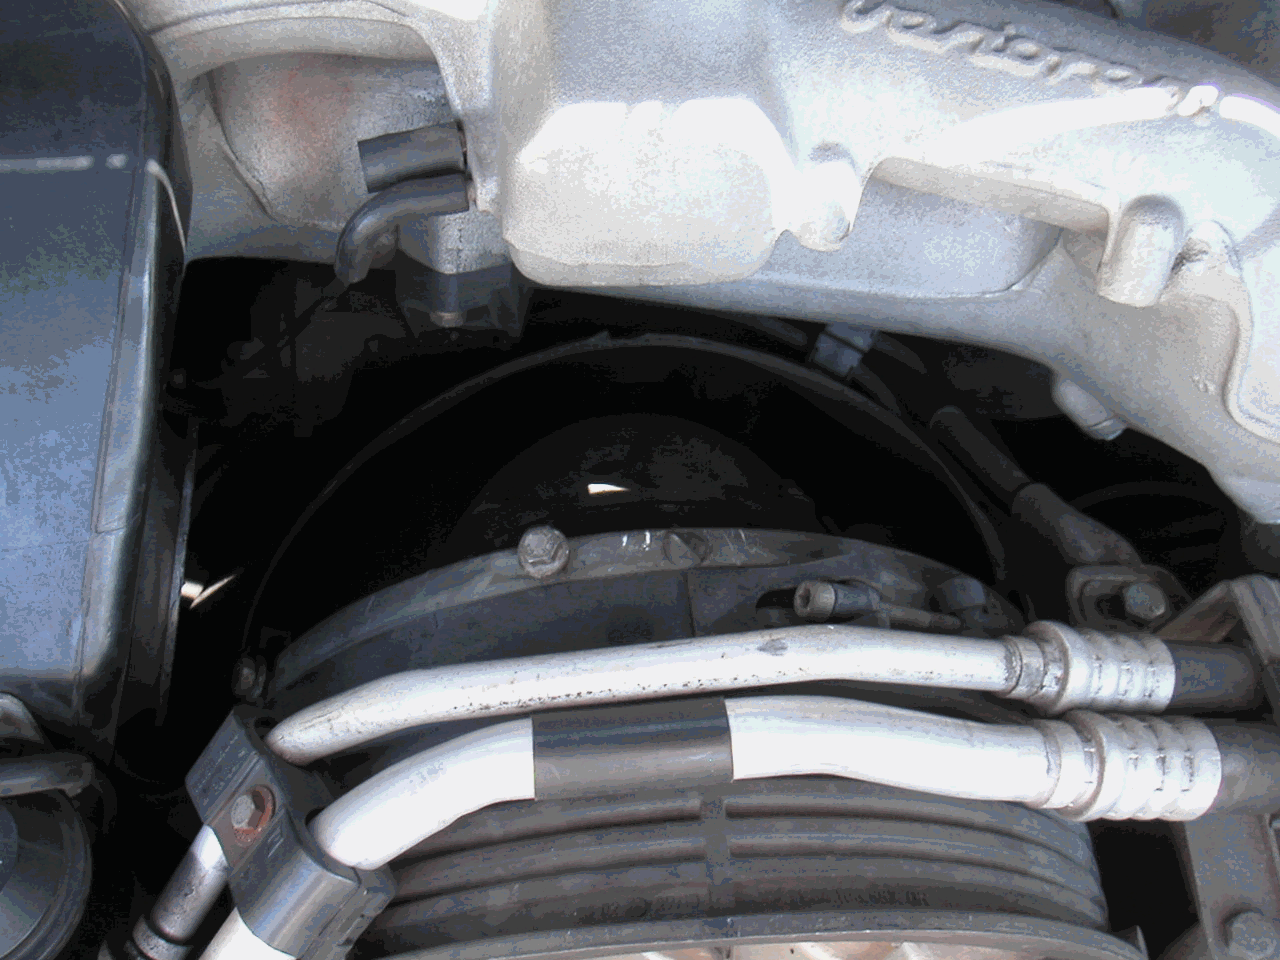
Shine a flashlight into the opening and look around – pull out any stuff that doesn’t belong in there – like fan belt fragments, leaves, pieces of rubber and so on. The picture above shows the center and LH bolt clearly, the RH one is not visible, but it’s right next to the AC bracket.
Now, clean up inside the opening if you wish, and put the new part in place, sliding it under the RH screw as you install it – make sure the clips in back are inside the fan shroud, and install the center screw – tighten it down moderately to hold everything in place while you tighten the LH and RH screws. You will find it helpful to push the hose back so that it’s about halfway past the rearmost (closest to the rear of the car) edge of the fan plenum opening that it will ultimately snap over – this will give you better access to that left side screw.
When the screws are snug (not tight!), work the rubber hose over the lip on the plenum – I found it best to get the bottom over the lip first, then the front (towards front of car), and then grab the "tab" to pull it over the back part of the lip.
Save the old part – if these become unavailable, you can cut off the remaining old gooe rubber, clean it up and seal the opening where the rubber used to be with some sheet aluminum – this will at least prevent a major air leak
You may want to make sure you know where to find this part, it is a designed in failure, and here on the west coast it looks like 10 to 12 years is when it is "due" – the dealer said that the part was "very popular"
Here is what it looks like with the new part in place: